Hello and welcome. I thought this tutorial would be perfect for Inspiration Avenue's Blog Party this weekend. You should stop by and check out all of the fun stuff over there. There are all sorts of links to tutorials, recipes, tips, etc. Invite your friends along to play.
This is a fun and rather easy project to do. I made this last spring and it lasted through fall. I just changed out the flowers from Spring to Summer and then in the Fall.
This is a fun and rather easy project to do. I made this last spring and it lasted through fall. I just changed out the flowers from Spring to Summer and then in the Fall.
Supplies you will need:
Chair
Drill
Jigsaw
Staple gun
Pencil/marker
Screen
1. Find old chair (mine was from the road side)
2. Use a round object (I used a plate) to mark out where the hole should go for the plants.
3. Use a drill to start the hole in the center of the marked out circle and then onto a jigsaw to cut out the rest of the circle.
4. Next place screening (can be metal or not, doesn't matter) over the hole and allow for it to droop down inside the hole low enough for a good amount of soil and moss to fit in (makes for better water retention) and staple it all the way around on top of the chair seat.
5. Cut off excess screening , leaving about 1/2" overlapping the chair seat (this will be covered by the moss and plantings.
6. Fill with moss and then soil and lastly whatever plants/flowers you want.
Remember you will need to water regularly as the soil is in an exposed area only being held in by the moss and screen. I planted pansies and ivy in it in the spring and then when summer came along, I left the ivy and took out the pansies, added in Petunias and Sweet William for height. It was lovely. This picture is when I first added the petunias, before the whole thing went crazy with blooms and some of the ivy was wrapped up around the back of the seat, while the rest reached for the ground.


 Inside we were to add a snippet and sign the booklet.
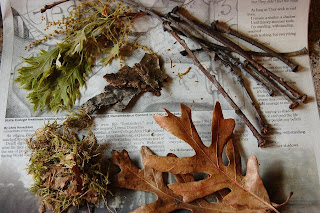
 Each person was to take 12 items and put 12 items in and then ship it off to the next person on the list. These are the 12 pcs I took to create a collage with and below are the 12 items I added to the box before sending it off on aother journey.


 My husband and I go to the $1. theater at least once a week. Tuesday night we went to see, "When in Rome". It is an adorable lighthearted movie. A high strung workaholic (Kristen Bell) no longer believes that she will find a Mr. Right that will make her put her career second. She flies to Rome to be in her sister's wedding and something magical happens. Here is the
  And here's the fellow that makes her believe in love again. Heck, he'd make me believe in it too. Woooeee! He's one hottie! Just found out he is Fergies Hubby. Drats!!